Healthy(er) Frosting Recipe
One of our favorite things about the holidays is decorating cookies with the family. While sugary buttercream frosting is delicious, we wanted to test out some healthier alternatives. Below you'll find a few options from Chef Aaron Holliday for a healthier holiday tradition.
Coconut Cream Frosting (dairy free, gluten free)
2 cans coconut cream (not coconut milk)
1/3 cup sweetener of your choice (maple syrup, powdered sugar)
2 tsp pure vanilla extract
Directions
1. Chill coconut cream in can for at least 24 hours
2. Turn can upside down and open from bottom. Pour off coconut milk (save it for smoothies) so you are just left with the cream.
3. Add coconut cream, sweetener and vanilla to bowl of stand mixer
4. Beat on high until well mixed and fluffy

5. Add frosting to Little Green Pouches for easy, mess-free cookie and cupcake decorating


Options
If you want to flavor or color your frosting naturally, add fruit and/or veggie purees to the frosting. Blueberries, beets, and carrots all provide great color and some extra nutrients.
Homemade Chia Seed Drink Recipe

Oh, chia seeds how we love you. You have more omega 3’s than salmon, more potassium than bananas, more calcium than milk, and are loaded with antioxidants, and you're also a complete protein.
Store-bought chia seed drinks, though? They are so tasty, but also so pricey. Once you realize how easy they are to make yourself, you may never go back to buying them. Here's how to make them.
Ingredients
2 cups of tart cherry juice (or the juice of your choice such as pomegranate juice)
2 cups water
6 TB chia seeds
Directions
1. Warm water, add to cup with chia seeds.
2. Stir well until chia seeds start to expand. Cover and put cup in the refrigerator. Let sit overnight.
3. The next day, stir juice into chia seed gel and mix well.
4. Pour into Little Green Pouches and store in fridge.
Our favorite pumpkin recipes for Fall
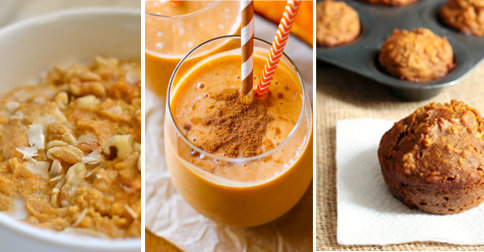
'Tis the season for all things pumpkin, so we've put together our favorite pumpkin recipes for fall.
Enter Our Back To School Giveaway

Head back to school organized and ready to go with the help of Little Green Pouch, Plan to Eat, and EasyLunchBoxes.
One lucky winner will receive:
A Little Green Pouch Starter Kit (you choose the size pouches)
A one-year membership to Plan To Eat. Plan to Eat is an online meal planner app that allows you to add and organize recipes, drag those recipes onto a calendar to plan them, and the software automatically creates your shopping list based on your planned recipes. By providing tools that streamline the meal planning process Plan to Eat equips households to eat better food, eat together, save money at the grocery store, and have a less stressful cooking experience in the kitchen.
A container set and one lunch bag (winner chooses color) from EasyLunchboxes. EasyLunchBoxes are the fastest way to pack school lunches. And the cooler bag is specially designed to carry the containers upright. Food and lids stay put. Great for work, school, and travel.
Enter Below: a Rafflecopter giveaway

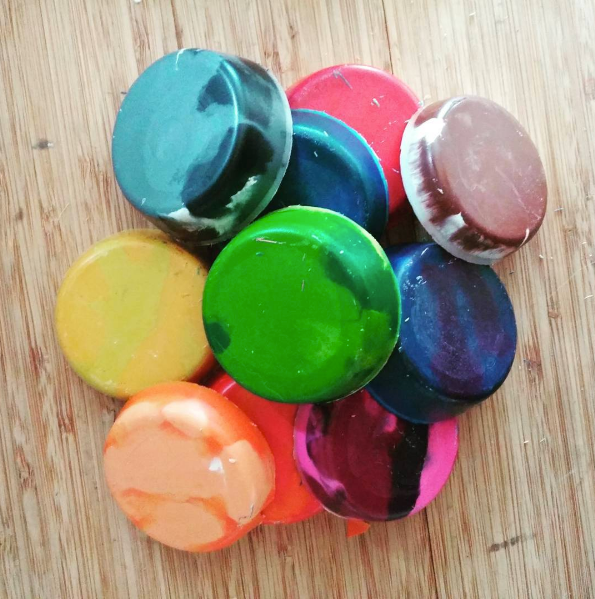
How To Make DIY Crayons

This weekend we whipped up a batch of DIY crayons. They were such a hit on Instagram, we decided to share the how-to with all of you. First of all, why DIY crayons? Do you find crayons break all the time, and you are constantly replacing them? These giant crayons will last a lot longer. You can buy oversized, "toddler" crayons, but they are expensive. So this super easy DIY version is a great solution.
All you need is an oven, a muffin tin, and crayons. You can use all the broken crayon pieces you have laying around, or use new crayons that you break yourself.
DIY Crayons
1. Preheat oven to 250
2. Gather crayons and remove wrappers. Tip: soak crayons in warm water, and wrappers will fall right off.
3. Sort by color, and place crayon pieces in muffin tins

4. Place muffin tin in oven until crayons melt (about 15 minutes)
5. Turn oven off. Let crayons cool for a bit in oven (about 30 minutes)
6. Remove crayons from oven, and let cool completely
7. Remove from muffin tin and enjoy!
Recent Articles
- 8 Ways To Get Organized For Back To School
- 10 homemade baby food recipes you can make in less than 10 minutes
- How to Make Homemade Almond Milk
- Clean Fifteen & Dirty Dozen — Your Guide to Buying Produce
- 10 Unique Baby Shower Gifts


